EcoxGear Speaker Manual⁚ A Comprehensive Guide
This manual provides a comprehensive guide to using your EcoxGear speaker․ It covers everything from pairing and connecting your speaker to troubleshooting common issues and using the EcoConnect feature for multi-speaker setups․ You’ll also find information on safety precautions, maintenance, warranty information, and where to find your user manual․ This guide is designed to help you get the most out of your EcoxGear speaker․
Introduction
Welcome to the world of EcoxGear speakers! This comprehensive manual serves as your guide to unlocking the full potential of your EcoxGear speaker․ Whether you’re enjoying your favorite tunes by the pool, rocking out at a tailgate party, or simply relaxing at home, EcoxGear speakers are designed to deliver powerful, immersive audio experiences in any environment․ This manual will walk you through every step, from setting up your speaker and connecting it to your devices to utilizing advanced features like EcoConnect for multi-speaker setups․
We understand that navigating new technology can sometimes feel overwhelming․ That’s why we’ve made this manual clear, concise, and easy to follow․ With step-by-step instructions and helpful illustrations, you’ll quickly become familiar with your EcoxGear speaker and all its capabilities․ We’re confident that this manual will equip you with the knowledge and confidence to fully enjoy your EcoxGear speaker․
So, let’s get started! Turn the page and embark on a journey of powerful sound and unparalleled versatility with your EcoxGear speaker․
Key Features of EcoxGear Speakers
EcoxGear speakers are renowned for their durability, versatility, and powerful sound․ Whether you’re seeking an adventure-ready companion for outdoor excursions or a reliable audio solution for home entertainment, EcoxGear offers a range of features designed to enhance your listening experience․ Here’s a glimpse of what makes EcoxGear speakers stand out⁚
- Waterproof and Shockproof Construction⁚ Built to withstand the elements, EcoxGear speakers are IPX7 waterproof, allowing you to enjoy music by the pool, at the beach, or even in the rain without worry․ Their rugged design also ensures they can handle bumps and drops, making them perfect for active lifestyles․
- Powerful Audio Performance⁚ EcoxGear speakers are engineered to deliver rich, full-range sound with deep bass and crisp highs․ Whether you’re listening to your favorite playlists, podcasts, or audiobooks, you’ll experience immersive audio that enhances every detail․
- Long Battery Life⁚ Enjoy hours of uninterrupted music with EcoxGear’s long-lasting battery life․ Whether you’re on a road trip, camping, or hosting a party, you can keep the music flowing without needing to constantly recharge․
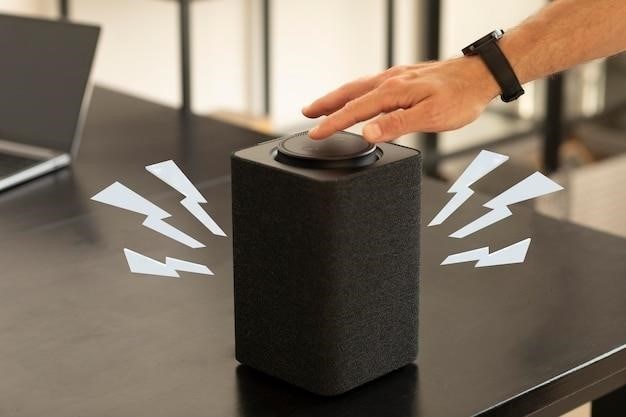
- Bluetooth Connectivity⁚ EcoxGear speakers seamlessly connect to your smartphones, tablets, and other Bluetooth-enabled devices․ Enjoy wireless freedom and the convenience of streaming your favorite music or podcasts from anywhere within range․
- EcoConnect Functionality⁚ For even greater sound immersion, EcoxGear speakers feature EcoConnect․ This innovative technology allows you to pair multiple EcoxGear speakers together to create a multi-speaker system․ Whether you’re hosting a large gathering or simply want to enhance your home theater experience, EcoConnect lets you customize your sound setup to suit your needs․
These key features, combined with EcoxGear’s commitment to quality and innovation, make their speakers the perfect choice for anyone seeking a reliable, versatile, and powerful audio solution․
Pairing and Connecting Your EcoxGear Speaker
Pairing your EcoxGear speaker with your smartphone, tablet, or other Bluetooth-enabled device is a simple process․ Follow these steps to get started⁚
- Power On Your Speaker⁚ Press and hold the power button on your EcoxGear speaker until the LED indicator lights up, indicating that the speaker is powered on․
- Enable Bluetooth on Your Device⁚ On your smartphone, tablet, or other Bluetooth-enabled device, go to the Bluetooth settings and enable Bluetooth․
- Search for Devices⁚ With Bluetooth enabled, your device will begin searching for available Bluetooth devices․ Look for the name of your EcoxGear speaker in the list of discovered devices․ The name of your EcoxGear speaker will typically include the brand name, followed by the model number․
- Pair the Devices⁚ Select the name of your EcoxGear speaker from the list of discovered devices․ Your device will attempt to pair with the speaker․ You may be prompted to enter a PIN code or confirmation message on your device․ The default PIN code for EcoxGear speakers is usually “0000”․
- Confirm Connection⁚ Once the pairing process is complete, your EcoxGear speaker will be connected to your device․ You will typically see a confirmation message on your device, and the LED indicator on your speaker may change color to indicate a successful connection․
Once your EcoxGear speaker is paired with your device, you can start playing music, podcasts, or other audio content wirelessly․ The range of your Bluetooth connection will vary depending on your device and the environment, but you can typically expect a range of up to 33 feet (10 meters)․
Using EcoConnect for Multi-Speaker Setup
EcoConnect is a unique feature that allows you to connect multiple EcoxGear speakers together for a truly immersive audio experience․ This feature is particularly useful for creating a multi-room audio system or for boosting the sound at outdoor events․ Here’s how to use EcoConnect to link your EcoxGear speakers⁚
- Power On Your Speakers⁚ Make sure that all of the EcoxGear speakers you want to connect are powered on․ You can use the power button on each speaker to turn it on․
- Pair the First Speaker⁚ Pair the first EcoxGear speaker with your smartphone, tablet, or other Bluetooth-enabled device․ Follow the steps outlined in the “Pairing and Connecting Your EcoxGear Speaker” section of this manual․
- Activate EcoConnect⁚ Once the first speaker is connected to your device, press the EcoConnect button (which is typically represented by a double diamond symbol) on the first speaker․ This will activate the EcoConnect feature on that speaker․
- Pair the Second Speaker⁚ On the second EcoxGear speaker, press and hold the EcoConnect button until the LED indicator starts flashing․ The second speaker will now enter pairing mode․
- Connect the Speakers⁚ The first EcoxGear speaker will automatically attempt to pair with the second speaker․ Once the connection is successful, the LED indicators on both speakers will change to indicate a successful pairing․
- Add More Speakers⁚ You can continue to add more EcoxGear speakers to your EcoConnect setup by following the same steps․ Simply pair the next speaker with the first speaker in the chain․
Once your EcoxGear speakers are connected using EcoConnect, you can enjoy synchronized audio across all of your speakers․ The audio will be played simultaneously on all of the connected speakers, creating a more immersive and powerful sound experience․
Troubleshooting Common Issues
While EcoxGear speakers are designed for durability and reliability, you might encounter some minor issues from time to time․ This section covers common problems and their solutions⁚
- No Power⁚ If your EcoxGear speaker doesn’t turn on, first ensure it’s fully charged․ Check the charging port and cable for any damage․ If the speaker still won’t power on, try resetting it by pressing and holding the power button for several seconds․ If the issue persists, contact EcoxGear support․
- Bluetooth Pairing Problems⁚ If your EcoxGear speaker is unable to pair with your device, make sure Bluetooth is enabled on your device․ Ensure your speaker is in pairing mode (often indicated by a flashing LED light)․ If the issue persists, try restarting both your speaker and device․ You might need to forget the speaker from your device’s Bluetooth settings and pair again․
- Poor Sound Quality⁚ If the sound quality is distorted or muffled, check the volume level of both your device and the speaker․ Ensure the speaker is placed in a location with good airflow, as sound can be affected by obstructions․ Consider cleaning the speaker grille to remove any dust or debris that might be affecting sound quality․
- Low Battery Life⁚ If the battery life seems shorter than expected, check the charging cable and port for any damage․ Avoid using the speaker in extreme temperatures, as this can affect battery performance․ If the battery continues to drain quickly, contact EcoxGear support․
- EcoConnect Issues⁚ If you’re experiencing problems with EcoConnect, ensure both speakers are powered on and in range․ Check if the EcoConnect feature is activated on both speakers․ If the problem persists, try restarting both speakers and following the pairing instructions again․ You can also contact EcoxGear support for further guidance․
This troubleshooting guide addresses common issues, but if you encounter problems not listed here, refer to the detailed user manual or contact EcoxGear support for assistance․
Safety Precautions and Maintenance
Your EcoxGear speaker is designed for enjoyment, but it’s essential to prioritize safety and proper maintenance to ensure its longevity and performance․ Here are some important precautions to keep in mind⁚
- Water Resistance⁚ While many EcoxGear speakers boast waterproof features, it’s crucial to understand the limitations․ Avoid submerging the speaker completely, especially for prolonged periods․ Do not use the speaker in saltwater, as it can damage the speaker’s components․ Regularly clean the speaker with a damp cloth to remove any dust or debris that might accumulate․
- Charging⁚ Always use the official EcoxGear charging cable provided with your speaker․ Avoid using damaged or incompatible cables, as they could damage the speaker’s battery or charging port․ Do not charge the speaker in extremely hot or cold environments․ When charging, ensure the speaker is placed on a flat, stable surface․
- Volume Levels⁚ While your EcoxGear speaker can deliver powerful sound, avoid playing it at extremely high volumes for extended periods․ High volumes can damage the speakers and potentially cause hearing damage․ Be mindful of your surroundings and consider using headphones if necessary․
- Sunlight Exposure⁚ Prolonged exposure to direct sunlight can cause the speaker’s plastic casing to fade or become brittle․ Avoid leaving the speaker in direct sunlight for extended periods․ If the speaker is exposed to sunlight, store it in a cool, shaded area when not in use․
- Cleaning⁚ Clean the speaker’s surface with a damp cloth to remove any dust or debris․ Avoid using harsh chemicals or abrasive cleaners that can damage the speaker’s finish․ Do not submerge the speaker in water for cleaning, as this could cause damage․
By following these simple safety precautions and maintenance tips, you can ensure your EcoxGear speaker remains in top condition for years to come․
Warranty Information
EcoxGear stands behind the quality of its products and offers a comprehensive warranty to provide peace of mind to its customers․ Here’s a summary of the warranty coverage for your EcoxGear speaker⁚
- Warranty Period⁚ EcoxGear typically offers a 2-year warranty on all new products, covering defects in materials and workmanship․ The specific warranty period may vary depending on the model and region, so it’s essential to refer to the warranty information provided with your speaker or on the EcoxGear website for detailed terms․
- What’s Covered⁚ The warranty typically covers defects in materials and workmanship․ This means that if your speaker malfunctions due to manufacturing errors, EcoxGear will repair or replace it free of charge within the warranty period․ However, the warranty does not cover damage caused by misuse, negligence, accidents, or unauthorized repairs․
- How to Claim⁚ If you believe your EcoxGear speaker has a defect covered by the warranty, contact EcoxGear’s customer support team․ They will guide you through the warranty claim process, which may involve providing proof of purchase and a description of the issue․ You may be required to return the speaker for inspection and repair or replacement․
- Exclusions⁚ The warranty typically excludes damage caused by⁚
- Misuse or abuse
- Accidents or natural disasters
- Unauthorized repairs or modifications
- Normal wear and tear
For detailed information about your specific EcoxGear speaker’s warranty coverage, refer to the warranty information provided with your speaker or visit the EcoxGear website․ By understanding the warranty terms, you can ensure your EcoxGear speaker is protected and enjoy peace of mind knowing you have support if any issues arise․